今回はIDCFクラウド上に作ったWindows Server 2012 R2 Std (64-bit)のサーバーで、fluentdをサービスとして動作させ、Windowsイベントログをfluentdで収集し、Yahoo!ビッグデータインサイトへインポートする手順をご紹介します。
※2016年10月1日より、サービス名称が「Yahoo!ビッグデータインサイト」から「トレジャーデータサービス by IDCF」に変更となっております。
ビッグデータ・ソリューションアーキテクトの高階(たかしな)です。 新年あけましておめでとうございます、ってもう月末だろが! もうすぐ豆まきだろうが!
私の所属するビッグデータ戦略グループも発足から早一年が経ちました。 昨年は、おかげさまでたくさんのみなさんにビッグデータ分析基盤サービスの「Yahoo!ビッグデータインサイト」(略してYBI)を知っていただいたり利用していただいたりしたのですが、まだまだ認知向上が足りないなーと感じています。 もっともっと、YBIの良さやメリットを知っていただかなきゃあいけませんね。
YBIは、fluentdを使ったデータインポートが非常にやりやすいソリューションなので、Linux系OS環境からのデータインポートは結構使われています。このようにOSSを使う場合、Windowsサーバーは置いてけぼりになってしまう事が多いですよね..。そのままだと意外と見づらいイベントログ、何か一括管理できるいい方法はないものか..? そんなWindowsサーバー管理者のみなさん、安心してください!インポートできますよ! 実は(と言うことでもないが)Windows環境からだってfluentdでインポートできるようになっているんです。
そこで今回はIDCFクラウド上に作ったWindows Server 2012 R2 Std (64-bit)のサーバーで、fluentdをサービスとして動作させ、Windowsイベントログをfluentdで収集し、YBIへインポートする手順をご紹介します。
YBI関連でお客さんとお話ししている際に「Windowsのイベントログをインポートしたい」という声があり、Web上の記事から調べてみるとnxlogというソフトウェアを使う方法がありました。(fluentdの公式サイトでも紹介) また、fluentdがWindowsを正式サポートしたという記事も見つけました。そこで「fluentdだけでYBI(TD)へデータインポートできたらもっと便利だな」と考え、いろいろ試したのが今回の記事を書いたきっかけです。 この記事が悩まれている方の参考になれば嬉しいです。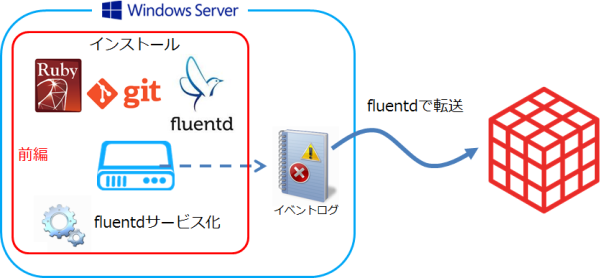
今回の記事、内容が長いので前後編の2回に分けます。
前編は上の図の通り、必要なソフトウェアのインストールと、fluentdをWindowsサービスとして動かすまでの紹介です。
1. Rubyのインストール
まず、fluentdを動かすためにRubyをインストールします。
http://rubyinstaller.org/downloads/
ここから、「Ruby 2.2.3 (x64)」をダウンロードしてインストールします。 途中、「Rubyの実行ファイルへ環境変数PATHを設定する」にチェックしましょう。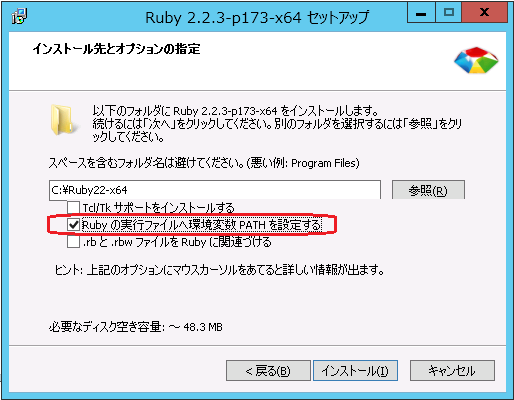
続いて、上記リンクからDevKitをダウンロードして解凍します。
ダウンロードするファイルは Devkit-mingw64-64-4.7.2-20130224-1432-sfx.exe
ここでは、解凍先を「C:\ruby」にします。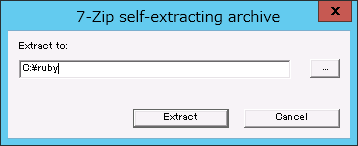
コマンドプロンプトを起動し、DevKitを解凍したフォルダへ移動して、次のコマンドを実行します。
C:\Users\Administrator>cd C:\ruby
C:\ruby> ruby dk.rb init

Initialization complete! Please review and modify the auto-generated
'config.yml' file to ensure it contains the root directories to all
of the installed Rubies you want enhanced by the DevKit.
「C:\ruby\config.yml」を開き、「- C:/Ruby22-x64」を追記します。 
仕上げに次のコマンドを実行します。
C:\ruby>ruby dk.rb install
[INFO] Updating convenience notice gem override for 'C:/Ruby22-x64'
[INFO] Installing 'C:/Ruby22-x64/lib/ruby/site_ruby/devkit.rb'
これで、Rubyのインストールができました。 コマンドプロンプトは一旦閉じておきましょう。
2. Gitのインストール
Windows版のGitをダウンロードしてインストールします。
http://www.git-scm.com/downloads
ここから「Git-2.7.0-64-bit.exe」をダウンロードしてインストールします。 途中、「Use Git from the Windows Command Prompt」を選択します。それ以外はデフォルトのままでOKです。
Gitのインストールはこれだけです。
3. fluentdのインストール
次はfluentdのgemを作成して、インストールしていきます。コマンドプロンプトを立ち上げ直して、以下の通り作業していきます。
C:\Users\Administrator>cd C:\

C:\>git clone https://github.com/fluent/fluentd.git
Cloning into 'fluentd'...
remote: Counting objects: 14533, done.
remote: Compressing objects: 100% (16/16), done.
remote: Total 14533 (delta 6), reused 0 (delta 0), pack-reused 14515
Receiving objects: 100% (14533/14533), 13.22 MiB | 5.53 MiB/s, done.
Resolving deltas: 100% (8409/8409), done.
Checking connectivity... done.
fluentdをWindowsのサービスとして登録するためには、windowsブランチの内容が必要なので、ブランチを変えます。
C:\>cd fluentd

C:\fluentd>git checkout windows
Branch windows set up to track remote branch windows from origin.
Switched to a new branch 'windows'
続いて、fluentdのgemを作っていきます。まずbundlerをgemでインストールします。
C:\fluentd>gem install bundler
Fetching: bundler-1.11.2.gem (100%)
Successfully installed bundler-1.11.2
Parsing documentation for bundler-1.11.2
Installing ri documentation for bundler-1.11.2
Done installing documentation for bundler after 7 seconds
1 gem installed
fluentdのbundle作業。
C:\fluentd>bundle
Fetching gem metadata from https://rubygems.org/.........
Fetching version metadata from https://rubygems.org/..
Resolving dependencies...
Installing rake 10.5.0
Installing cool.io 1.4.3 with native extensions
Installing ffi 1.9.10
Installing flexmock 1.3.3
Installing http_parser.rb 0.6.0 with native extensions
Installing json 1.8.3 with native extensions
Installing msgpack 0.5.12 with native extensions
Installing sigdump 0.2.3
Installing string-scrub 0.0.5 with native extensions
Installing thread_safe 0.3.5
Installing win32-api 1.5.3
Installing yajl-ruby 1.2.1 with native extensions
Installing multi_json 1.11.2
Installing parallel 1.6.1
Installing power_assert 0.2.7
Installing rr 1.1.2
Installing simplecov-html 0.5.3
Installing timecop 0.8.0
Using bundler 1.11.2
Installing win32-ipc 0.6.6
Installing win32-service 0.8.7
Installing tzinfo 1.2.2
Installing windows-api 0.4.4
Installing parallel_tests 2.2.2
Installing test-unit 3.1.7
Installing simplecov 0.6.4
Installing win32-event 0.6.3
Installing tzinfo-data 1.2015.7
Installing windows-pr 1.2.4
Installing test-unit-rr 1.0.5
Using fluentd 0.12.15 from source at `.`
Bundle complete! 9 Gemfile dependencies, 31 gems now installed.
Use `bundle show [gemname]` to see where a bundled gem is installed.
fluentd 0.12.15のgemを作成します。
C:\fluentd>bundle exec rake build
fluentd 0.12.15 built to pkg/fluentd-0.12.15.gem.
そしてfluentdのgemをインストール!
C:\fluentd>gem install pkg/fluentd-0.12.15.gem -no-ri -no-rdoc
Successfully installed fluentd-0.12.15
Parsing documentation for fluentd-0.12.15
Installing ri documentation for fluentd-0.12.15
Done installing documentation for fluentd after 4 seconds
1 gem installed
fluentdのgemがインストールできたら、パスの通っているフォルダ(ここではC:\Ruby22-x64\bin)へ必要なファイルをコピーしておきます。
C:\fluentd>copy C:\Ruby22-x64\lib\ruby\gems\2.2.0\bin\fluent* C:\Ruby22-x64\bin
C:\Ruby22-x64\lib\ruby\gems\2.2.0\bin\fluent-cat
C:\Ruby22-x64\lib\ruby\gems\2.2.0\bin\fluent-cat.bat
C:\Ruby22-x64\lib\ruby\gems\2.2.0\bin\fluent-debug
C:\Ruby22-x64\lib\ruby\gems\2.2.0\bin\fluent-debug.bat
C:\Ruby22-x64\lib\ruby\gems\2.2.0\bin\fluent-gem
C:\Ruby22-x64\lib\ruby\gems\2.2.0\bin\fluent-gem.bat
C:\Ruby22-x64\lib\ruby\gems\2.2.0\bin\fluentd
C:\Ruby22-x64\lib\ruby\gems\2.2.0\bin\fluentd.bat
        8 個のファイルをコピーしました。
インストール関連はここまでで終了、続いて動作テストをしていきましょう。
4. fluentdの起動テスト
まずは、インストールしたfluentdが動作するかどうか、サンプルのコンフィグを使って確認します。
C:\>fluentd -c C:\/fluentd/example/in_forward.conf
2016-01-21 09:48:36 +0900 [info]: reading config file path="C:\/fluentd/example/in_forward.conf"
2016-01-21 09:48:36 +0900 [info]: starting fluentd-0.12.15
2016-01-21 09:48:36 +0900 [info]: spawn command to main (windows) : C:/Ruby22-x64/bin/ruby.exe 'C:/Ruby22-x64/bin/fluentd' -c C:\/fluentd/example/in_forward.conf --no-supervisor
2016-01-21 09:48:37 +0900 [info]: reading config file path="C:\/fluentd/example/in_forward.conf"
2016-01-21 09:48:37 +0900 [info]: starting fluentd-0.12.15 without supervision
2016-01-21 09:48:37 +0900 [info]: gem 'fluentd' version '0.12.15'
2016-01-21 09:48:37 +0900 [info]: adding match pattern="test" type="stdout"
2016-01-21 09:48:37 +0900 [info]: adding source type="forward"
2016-01-21 09:48:37 +0900 [info]: using configuration file:
<ROOT>
  <source>
    type forward
  </source>
  <match test>
    type stdout
  </match>
</ROOT>
2016-01-21 09:48:37 +0900 [info]: listening fluent socket on 0.0.0.0:24224
動作しましたね。Ctrl-cで終了しましょう。
5. fluentdのサービス登録
Windowsサービスとして登録します。 管理者権限で立ち上げたコマンドプロンプトから次のコマンドを実行します。
C:\>fluentd --reg-winsvc i
成功しても何も表示されません。 管理ツールのサービスで確認してみましょう。「Fluentd Windows Service」として登録されています。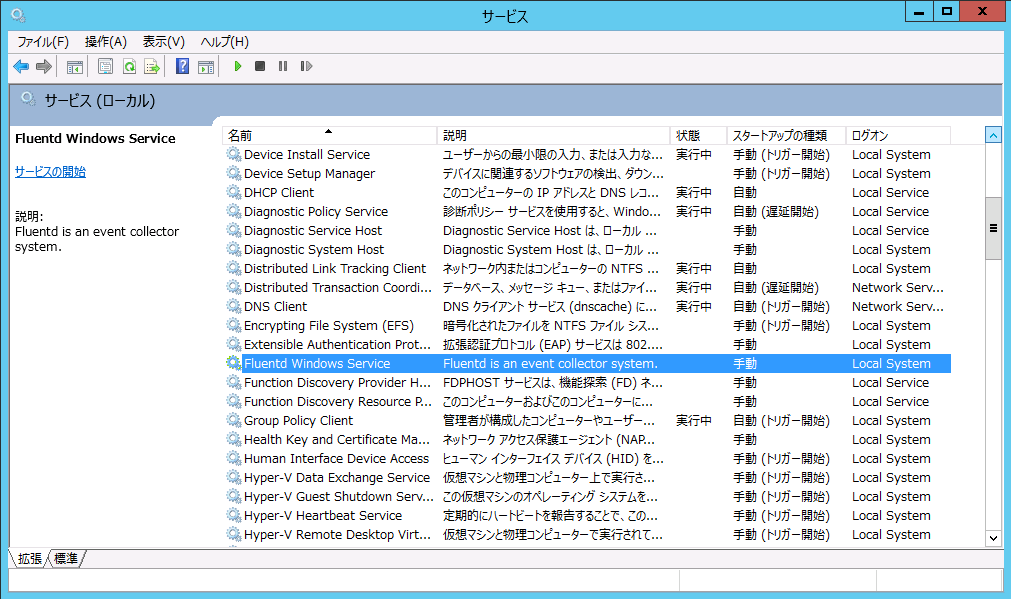
ちなみに、サービス登録を削除したい場合は、管理者権限で立ち上げたコマンドプロンプトから
C:\>fluentd --reg-winsvc u
です。やはり成功しても何も表示されません。
続いて、fluentdのオプションを登録していきます。 fluentdはC:\fluentd配下にインストールされています。ここから先の設定ファイルやログファイルは、C:\fluent配下に必要なフォルダを作成して行っていきます。
C:\>mkdir fluent
C:\>cd fluent
C:\fluent>mkdir conf log test
今回オプションで指定する内容は下記のとおりです。 ここから先、コンフィグファイルとログファイルは下記のものを使います。
- コンフィグファイル: C:/fluent/conf/fluent.conf
- ログファイル: C:/fluent/log/fluent.log
オプション設定は次のコマンドで実行します。
C:>fluentd --reg-winsvc-fluentdopt '-c C:/fluent/conf/fluent.conf -o C:/fluent/log/fluent.log'
やっぱり成功しても何も表示されません。
6. サービスとして起動テスト
さて、Windowsサービスとしてfluentdが起動できるかどうか、テストしていきましょう。
まず、コンフィグファイル(fluent.conf)を下記のように設定します。in_forwardで受け付けてファイルに書き出すだけの設定です。
<source>
  type forward
</source>

<match **>
  type file
  path C:/fluent/test/output
  time_slice_format %Y%m%d_%H%M%S
  time_slice_wait 5s
</match>
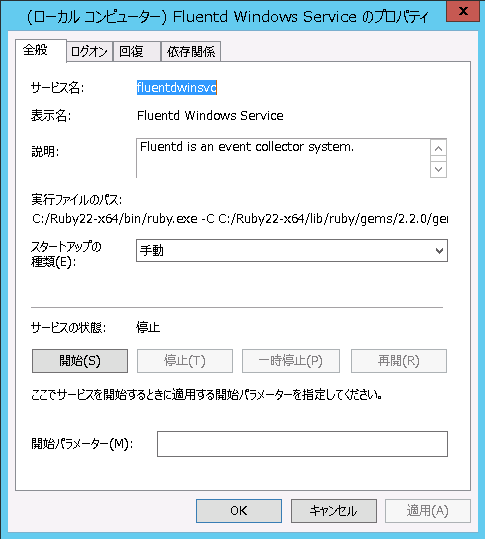
管理ツールのサービスから「Fluentd Windows Service」を開始してみましょう。
成功するとこうなります。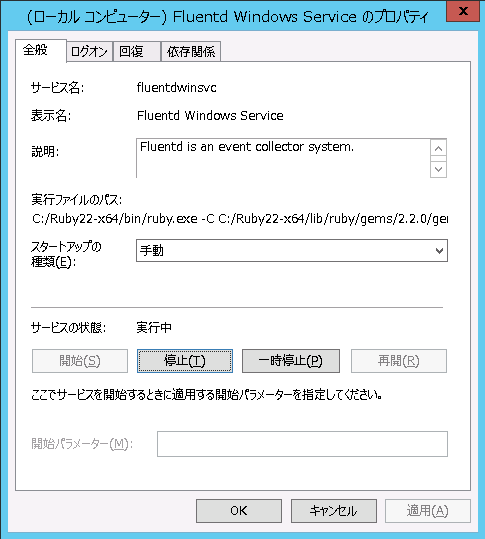
ログファイルにはこんなログが書き出されているはずです。
2016-01-21 09:58:23 +0900 [info]: reading config file path="C:/fluent/conf/fluent.conf"
2016-01-21 09:58:23 +0900 [info]: starting fluentd-0.12.15
2016-01-21 09:58:23 +0900 [info]: spawn command to main (windows) : C:/Ruby22-x64/bin/ruby.exe 'C:/Ruby22-x64/bin/fluentd' -c C:/fluent/conf/fluent.conf -o C:/fluent/log/fluent.log -x fluentdwinsvc --no-supervisor
2016-01-21 09:58:24 +0900 [info]: reading config file path="C:/fluent/conf/fluent.conf"
2016-01-21 09:58:24 +0900 [info]: starting fluentd-0.12.15 without supervision
2016-01-21 09:58:24 +0900 [info]: gem 'fluentd' version '0.12.15'
2016-01-21 09:58:24 +0900 [info]: adding match pattern="**" type="file"
2016-01-21 09:58:24 +0900 [info]: adding source type="forward"
2016-01-21 09:58:24 +0900 [info]: using configuration file:
<ROOT>
  <source>
    type forward
  </source>
  <match **>
    type file
    path C:/fluent/test/output
    time_slice_format %Y%m%d_%H%M%S
    time_slice_wait 5s
    buffer_path C:/fluent/test/output.*
  </match>
</ROOT>
2016-01-21 09:58:24 +0900 [info]: listening fluent socket on 0.0.0.0:24224
設定に沿ってログが書き出されるかどうか、テストしてみましょう。コマンドプロンプトで次のコマンドを実行してみます。
C:\>echo {"string":"Hello Fluentd Windows Service"} | fluent-cat test
C:/fluent/testフォルダに、output.yyyyMMdd_HHmmss_0.logというファイルが作成され、次のようなログが書き出されているはずです。
OKならFluentd Windows Serviceを一旦停止しておきます。
さあ、ここまででWindowsサーバーからfluentdでログ転送する準備が整いました。
続いて、Windowsイベントログの収集に進みます..が記事が長~くなってきましたね。 今日の記事はここで終了し、次回に続きたいと思います。
参考記事
今回の投稿作成にあたり、次の記事を参考にさせていただきました。感謝申し上げます。m( )m
- fluentd for WindowsをRuby 2.2で動かす
- Fluentd が Windows を正式サポートしたので動かした
- fluentd Windows版をWindowsサービスとして動かす
- Fluentd v0.14.0.pre.1のリリース
- Windowsイベントログをfluentdプラグインで集めてmongoDBに突っ込む
coming soon!
- 7. Windowsイベントログを集める
- 8. YBIへログ転送
それでは、ごきげんよう!